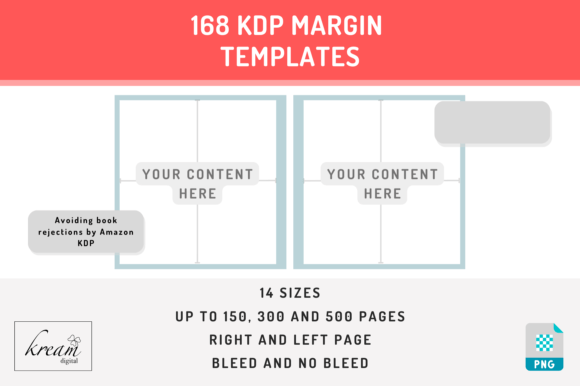
Stop Amazon KDP Rejections: Your Margin Template Guide
Getting that rejection email from Amazon KDP is a frustrating experience. You've poured your heart into writing, designing a stunning cover, and formatting your text, only to be told your interior file doesn't meet their technical specifications. The most common culprit? Incorrect margins. This is where KDP Interior Margin Templates become your most reliable design asset, transforming a technical headache into a straightforward design step.
Understanding the Anatomy of a KDP-Ready Book
Think of your book's interior like a house. The trim size is the foundation, the margins are the walls, and the gutter is the hallway that ensures pages don't get lost in the binding. Amazon KDP has strict requirements for these elements because they directly impact the physical quality and readability of the printed book. A margin that's too small risks text being cut off during trimming. A gutter that's too narrow means words disappear into the spine, making your book difficult to read. These aren't just aesthetic preferences; they are functional necessities for professional publishing.
This is precisely the problem that a dedicated set of KDP Interior Margin Templates solves. Instead of guessing measurements or deciphering complex technical guides, you get a precise, visual framework. These templates are typically provided as PNG files with a transparent background. This design choice is intentional and brilliant—it allows you to overlay the template directly onto your page layout in any design software like Adobe InDesign, Affinity Publisher, or even Canva. The transparent background means you see your actual content interacting with the safe zones in real-time.
The Critical Difference: Bleed vs. No Bleed
Before you select a template, you must answer one fundamental question: does your book have bleed? Bleed refers to any design element—like a background color, image, or texture—that extends to the very edge of the page. For a "no bleed" book, all your content, including text and interior images, sits comfortably within the page's final trimmed size. The margins here are your safety zone.
For a book with bleed, your design must extend beyond the final trim line. This extra area is what gets physically cut off during the printing process, ensuring a clean, edge-to-edge finish. Using a bleed template is non-negotiable if you have full-page chapter openers, colored backgrounds, or images that touch the page edge. The template will show you the trim line (where the page will be cut) and the bleed area (the extra space your design must fill). Applying the wrong template is a surefire path to rejection or a poorly printed book.
Matching Your Project to the Perfect Template
The beauty of a comprehensive template pack is its versatility. Whether you're a novelist, a non-fiction author, a journal creator, or a photographer compiling a portfolio, there's a size that fits. The process is methodical and eliminates guesswork.
First, confirm your book's trim size. This is the final, physical size of your book. Common choices like 6"x9" for novels or 8.5"x11" for workbooks are just the start. The list is extensive, covering everything from compact 5"x8" paperbacks to large-format 8.27"x11.69" art books. Choosing the right size is a strategic decision based on genre, content, and reader expectation.
Next, determine your page count. This is crucial because the gutter margin—the space in the center where the pages are bound—needs to increase as the book gets thicker. A 100-page book has a much narrower spine than a 500-page book. Therefore, templates are often categorized by page ranges: up to 150 pages, up to 300 pages, and up to 500 pages. Selecting the template that matches your page count ensures the gutter is wide enough to keep all text readable, no matter how thick the spine.
A Practical, Step-by-Step Workflow
Using these templates is a clean, professional process. Once you've chosen the correct template for your bleed type, page count, and trim size, you integrate it into your layout file. Remember, these are left and right page templates. For a standard book layout, odd-numbered pages are on the right, and even-numbered pages are on the left.
- Apply the Right Template: On all your right-hand (odd) pages, place the corresponding right-page template. Ensure it covers the entire page canvas.
- Apply the Left Template: On all your left-hand (even) pages, place the left-page template.
- Design Within the Safe Zone: The template will have a light blue border indicating the live area. All your essential text, captions, and important imagery must stay within this border. For bleed designs, you can extend background elements beyond this border to the edge of the canvas.
- Final Cleanup: Once your interior design is complete and you've verified everything is within the safe zones, delete the template layers from your file. Do not leave them in the final PDF.
- Export and Verify: Save your file as a high-resolution PDF. Before uploading, use the KDP previewer tool. It will simulate the printed book and flag any remaining margin or bleed issues, giving you one last chance to correct them.
By following this workflow, you're not just avoiding rejection. You're adopting a professional publishing standard. You're ensuring your readers have a comfortable, immersive experience where the words are easy to read and the design enhances the content rather than distracting from it. It's a small technical step that makes a world of difference in the final product's quality and your credibility as a publisher.